

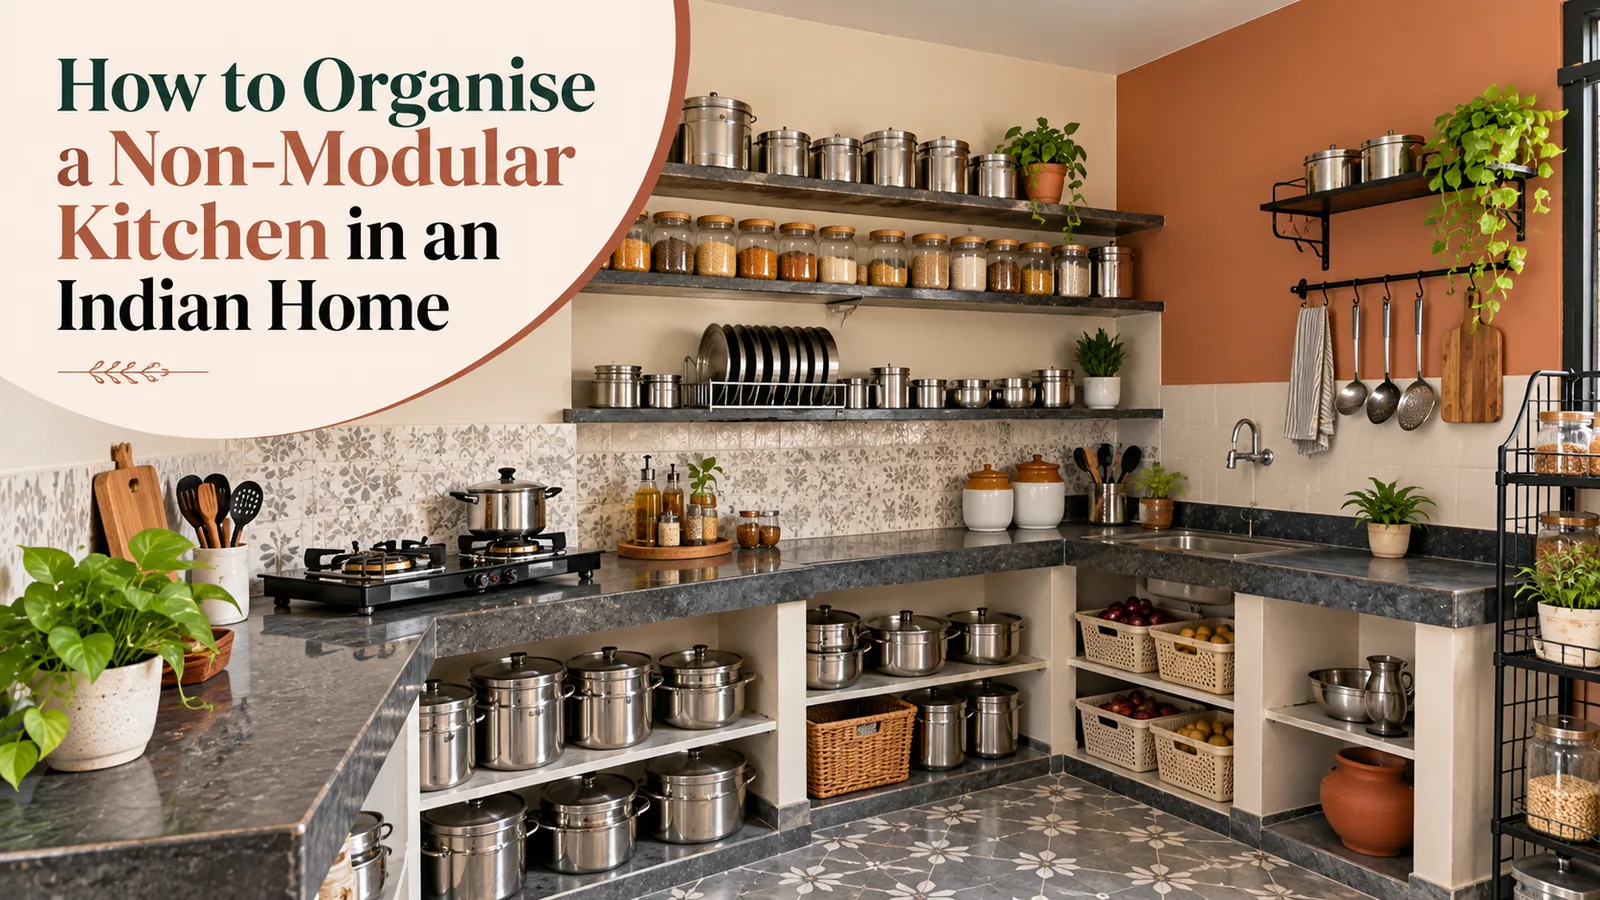
A non-modular kitchen, usually a stone platform on a masonry base with open bays or basic shelves underneath, can be organised well without a renovation. The method is simple: sort by how often you use things, give each task a zone, bring daily items to waist and eye level, and use the wall and the inside of the open bays properly. Most clutter in these kitchens comes from deep, open spaces where things get stacked and forgotten.
Here is a step-by-step system that works for a typical builder kitchen, including options for renters, and the signs that it is time to upgrade.
Step 1: Empty, Sort and Count
Take everything out of one bay at a time and sort it into four groups: used daily, used weekly, used occasionally (festival cookware, extra vessels) and not used. Remove duplicates and anything broken. Counting what you actually own tells you how much storage you really need, which is useful even if you later plan a new kitchen.
Step 2: Give Every Task a Zone
Zone | Where | What goes there |
|---|---|---|
Cooking | Bays and wall nearest the hob | Masala, oil, pressure cookers, kadhai, tawa, ladles |
Preparation | Counter between hob and sink | Chopping boards, knives, mixing bowls, the mixer |
Washing | Around and under the sink | Cleaning supplies, dish rack, bin |
Storage | Far bays, high shelves, loft | Atta, rice, dal, monthly stock, occasional vessels |
Serving | Near the dining side | Thalis, plates, glasses, bowls |
Keep daily items between knee and eye height. Put heavy and rarely used items low or high, not in the most convenient reach.
Step 3: Organise the Open Bays Under the Platform
Open bays are deep, so items at the back disappear. Fix that with things that bring the back forward:
Freestanding pull-out racks or slide-in wire trolleys sized to the bay width.
Stackable bins or baskets that you pull out as a unit.
Shelf risers to create two levels in tall bays.
Airtight containers in one or two sizes, labelled, for grains and dal.
A ventilated, uncluttered bay for the gas cylinder, with the valve easy to reach.
Measure each bay’s width, depth and height before buying anything. Masonry openings vary, and a rack that is a few centimetres too wide will not fit.
Step 4: Fix the Under-Sink Area
The bay under the sink is usually the dampest and messiest. Check for leaks first and get them repaired. Then raise items off the floor on a plastic rack or tray, keep only cleaning supplies there, and leave space around the pipes. Avoid storing food, paper or cloth under the sink.
Step 5: Use the Wall and Doors
A rail with hooks near the hob for ladles and spatulas.
A narrow shelf or rack for daily masala jars within arm’s reach of the hob.
A wall-mounted plate or cup rack near the sink.
Door-back racks for foil, wraps and cleaning cloths.
Keep open wall storage limited to what you use daily. In Indian cooking, oil and dust settle quickly on open shelves near the hob.
If You Rent: Options Without Major Changes
Freestanding racks and trolleys that need no fixing.
Over-the-door organisers and tension rods inside bays.
Adhesive hooks for light items, tested first on the tile.
A slim rolling trolley for extra counter and storage space.
Check with your landlord before drilling tiles or walls.
Step 6: Keep It Working
Give every item a fixed place, return things there after use, and do a ten-minute reset once a week. Review the storage zone every month when new stock arrives, and use older stock first.
When It Is Time to Upgrade
Organising helps, but some problems cannot be solved with racks:
The platform height causes back strain for the main cook.
Damp, leaks or termites keep returning under the sink.
The bays are too deep or oddly sized for any rack to work.
You simply have more to store than the kitchen can hold.
If these sound familiar, you can keep the existing platform and add factory-made shutters and drawers, or replace it with a full modular kitchen. Our guide to upgrading a builder kitchen compares both routes, and our modular vs carpenter-made kitchen comparison explains the difference in build.
How Reedify Can Help
Reedify Modulars manufactures kitchens at its own factory in Rohtak and installs them across Haryana and Delhi NCR. If you decide to upgrade, we measure your existing kitchen and plan storage around what you actually own. To discuss your modular kitchen upgrade, share photos and measurements of your current platform with our team.